Salesforce Tutorial# 15: Salesforce Sandbox and Overview of Force.com Capabilities
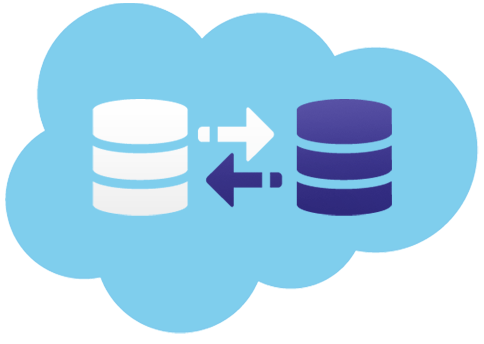
One of the best capabilities of Force.com platform is Salesforce Sandbox, which allows us to create a copy of our production organization.
In this article of our Salesforce Learning, we will see how one can create multiple copies for their production organization in a separate environment for various purposes like training, testing, and development. The isolated architecture of sandboxes from Salesforce production organization, will not affect the production organization by any operation performed in the sandbox.
Types of Salesforce Sandbox:
Salesforce supports four types of sandboxes
1. Developer Sandbox
These are special configuration sandboxes for coding and testing by a single developer as well as multiple developers. In the multiuser environment, the primary development is isolated until the user shares the data. It has a copy of your organizational data such as metadata.
2. Developer Pro
Similar to developer sandbox this is also intended for development and testing in an isolated environment. The main difference between both sandboxes is the capability of developer pro sandbox to grab data from production. The more amount of data can be stored and handled by developer pro sandbox as compared to developer sandbox.
3. Partial Copy Sandbox
A Partial Copy sandbox is used as a testing environment. A copy of the production organization configuration with the sample of data defined by a sandbox template is the part of the partial sandbox. This is used for quality assurance tasks such as user acceptance testing, integration testing, and training.
4. Full Sandbox
A Full sandbox can be used as a testing environment. The load testing, performance testing, and staging are supported by this sandbox. Full sandboxes are a replica of all data, such as object records and attachments, and metadata. If multiple users are working on overlapping areas then all of the changes merged here.
We can restrict field tracking history and chatter activity on some level. The default settings omit field tracking, still, you can include up to 180 days of field tracking.
Enable Web-to-Lead (or Web-to-Case) for the Org:
Web-to-Lead Form HTML Code Generation
Perform the following steps to enable the settings for Web-to-Lead:
- Go to Setup
- Select build
- Click on customize
- Then select Leads
- After that select Web-to-lead
- Then click on Create
- These steps will take you to the setup of entering URL to generate Web-to-lead form code.
Change the form-action url like
|
1 |
<form action=https://www.salesforce.com/servlet/servlet.WebToLead?encoding=UTF-8 method=”Post”> |
this endpoint must be updated.
Web-to-Case Form HTML Code Generation
Use the following steps to generate Web-to-Case form HTML code
- Go to setup
- Then select build
- Choose Customize
- Select Self-Service
- Click on Web-to-Case HTML generator
Change in the following URL
|
1 |
<form action=https://www.salesforce.com/servlet/servlet.WebToLead?encoding=UTF-8 method=”Post”> |
this endpoint must be updated.
Introduction of Site.Com and creation of site using it:
Sites.com is one of the features of force.com which enables developers to build and deploy public websites and web applications. The Custom domain name is given to each web site. Visualforce is used to build all force.com websites.
To create a basic Force.com Site, you need to follow the following four steps:
- Register a domain name
- Create a Force.com Site using the domain name
- Assign Visualforce pages to the Site
- Set up the security access permissions
1. Registering a domain name
In order to create your sites, you must first register your Force.com domain name. This is a one-time activity. To create domain name go to Setup -> Develop -> Sites and enter a domain name to use.
Your domain name will look something like DomainName-developer-edition.na6.force.com.
2. Creating a Site
Take a reference to your site from the domain name.
To do this go to Setup -> Develop -> Sites, then hit the New button. Besides the label and name fields, set the following important fields are:
- Active– this will enable that end users can access your site.
- Default Web Address– to set a particular location, enter here. Otherwise, for the demo, leave this blank.
- Active Site Home Page– to set the default Visualforce page to display when your site is active. By default, it is set to under construction.
3. Assigning a Visualforce Page
Hit the Edit button to add Visualforce pages that you want to expose on your Site as Visual force creates multiple pages to display. If you want to edit the homepage, you can do it by assigning Visualforce pages to your site.
4. Setting up Security
The security can be handled by applying several ways like IP restriction, intranet restriction/ firewall, also you can control your data view level. The site security can be managed by the visibility of pages, public access settings, and user registration and verification.
Introduction of Debug Logs:
The main use of debug logs is to record the system processes, database operations, as well as errors that occur when executing a transaction or running unit tests. This can contain information about HTTP callouts, Database changes, Apex errors, Automated workflow processes, approval processes, Resources used, Workflow rules, assignment rules, and validation rules.
Use the following steps to create a debug log:
Step#1 – Login as a System Administrator to saleforce.com site
Step#2 – Click on the Setup link.
Step#3 – Click on “Administration Setup” available on the left side, then expand the Monitoring section.
Step#4 – Click on the “Debug Logs” option
Step#5 – as no debug logs have been created the basic screen will not have any row in either of the two tables. In this case, click the “New” button.
Step#6 – Select the user(s) that you want to start the debug log for. Last Click the “Save” button when you are finished.
Summary
So we now have a decent idea of what is the sandbox and the different capabilities of Froce.com. If you wish to refer previous articles then do check our other articles in the series.
Tutorial Index
- Introduction to Cloud Computing (Salesforce.com and Force.com)
- Overview of Database Concepts (Salesforce.com)
- Introduction to Force.com
- Building Salesforce Custom App and Objects
- Object Relationships and Formula Field in Salesforce
- Salesforce Security Model and Overview
- Automation in Salesforce
- Approval Process in Salesforce
- Introduction to SOQL and SOSL
- Introduction to Apex
- Salesforce Data Management
- Visualforce MVC Architecture on Cloud
- Salesforce Reports and Dashboards
- Building a Visualforce (Custom) Page for the Salesforce App
- Salesforce Sandbox and Overview of Force.com capabilities
- Learning Apex and Deployment Tools