Speed up your WordPress Site – No Coding Required – Part 1
In this article, we will show you how to reduce the page load time and Speed up your WordPress Site by disabling unnecessary page bloat and optimizing image size while maintaining quality. With these alone can get your site to load in under 3 seconds but there is more we can do if you want to see how fast you can really be – we’ll cover this in part 2 of this post. With Google now using speed as a direct ranking factor it’s worth paying attention to.
Your site before optimization:
We need to run a ‘before’ test to see how much we will have improved the speed of your site. Head on over to gtmetrix.com and add your URL. Keep it so you can do another one afterward and compare.
Why should You Speed up your WordPress Site?
- While it hasn’t always been the case, the speed of your site is a ranking factor in Google and other search engines these days.
- Neil Patel (SEO consultant famous on the web) says that 40% of users will abandon a website if it takes more than 3 seconds to load.
- Related to the above is that there is evidence to suggest that Bounce Rate (the proportion of visitors who leave your web pages) goes up with the slowness of your web pages. Bounce Rate is also a ranking factor.
Note:
- It isn’t the worst idea in the world to take a backup of your site before starting. If you are not so confident then this means you can rest easier during this and other alterations you make on your site.
- If you have any SEO plugins running on your site (eg Yoast or others) then disable it for a short time. This is because they can sometimes combine CSS and other files which we may want to block and having them running can interfere with the process we describe below.
Step 1 – Remove Unnecessary bloat:
Before we start, uninstall any plugins which you aren’t currently using. It’s possible that they are injecting files into your page which you don’t need.
The waterfall:
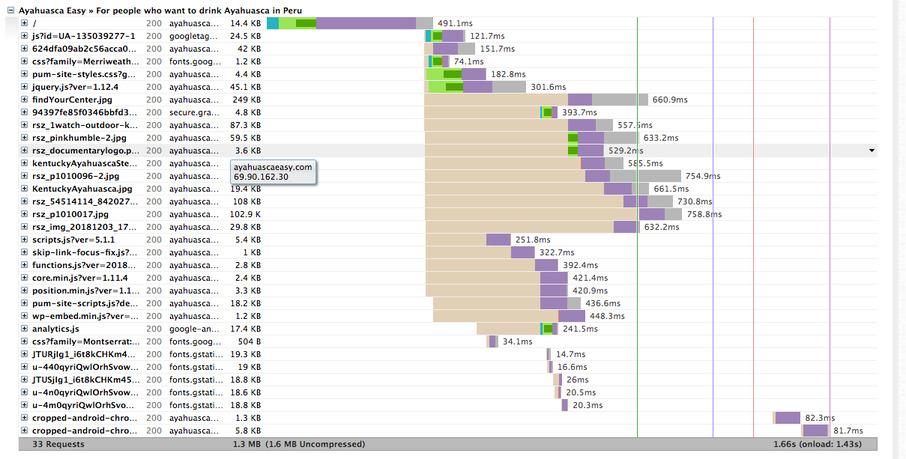
An example of a waterfall analysis from gtmetrix.com.
Go back to your first gtmetrix.com analysis and click on the ‘waterfall’ tab. A waterfall is a list of all of the resources that are being brought into the page. It will tell you how long they take to download. The total time for all of these to download is the time it takes for your entire webpage to load.
The name of the game now is to go through the list of resources in the waterfall tab and analyze each one to determine if we should disable it or not. Here are a few things to look for when analyzing a given resource.
- Look at the URL of the resource. The pathname will tell you what plugin is causing it to come in. If this plugin is not being used on this particular page then you know you can remove it. For example, a gallery plugin which imports images to the page even though there is no gallery on it.
- But plugin resources aren’t all you will see. You will quite possibly see Google Analytics or Tag Manager code (which you should keep), font styles, images, and JS and CSS files.
- Make a list of all the ones you’d like to remove and then move onto the next step.
- Don’t worry about putting images on the list for now. We’ll come back to those.
Install the Asset CleanUp Plugin:
If you aren’t sure which one it is exactly I’m suggesting you download then you can check this link here to the developers’ info on this plugin.
We then need to take the list of resources from your analysis that you have decided to disable and navigate to the page (in the CMS) you analyzed initially and edit it.
The Asset CleanUp plugin, for each page and blog post, will have a tab near the bottom of the screen which allows you to turn off resources as you please. Go through your list and turn off each one you identified to disable it for this page.
You also have the option for each resource to turn it off over all the pages on the site or just the page that you are editing. If the resource isn’t needed across the whole site then you can disable from all pages.
Some extra tips:
- It’s unlikely that you can remove jQuery but if you are sure that your page does not use it then you could disable it.
- Asset CleanUp gives you the option to remove WordPress core files as well but you need to tell the plugin specifically show these first. To do so navigate to the Asset CleanUp plugin in the CMS and find the settings tab. Find the option to ‘Hide Core Files’ and turn it off. It is on by default so you won’t see core files until you do this.
As an added bonus we can also use the Asset CleanUp Plugin to disable several resources which are common to many WordPress sites but that are often not needed and add extra weight to the page. For example, if you navigate to the ‘Asset Cleanup’ menu item in your WordPress admin you will see a ’settings’ option for the plugin itself. Click this and then turn off the,
- Emoji’s Option. It’s likely you aren’t using these but leave them on if you are.
- You can most likely turn off the jQuery Migrate option as well. This is only for older sites so if your site is new turn this off as well.
- You could also turn off comments. If you’re not using WordPress as a blog then you won’t need comments at all but also potentially you can simply remove it on a page by page basis. For example, the Home Page doesn’t need comments usually.
Step 2: Images
In the same waterfall tab we used earlier you would have noticed that the list has images too.
Have a look at each of the images and take note of the file size (4th column of info in the waterfall tab of gtmetrix.com analysis). You could also look at the grey bar to the right of the 4th column which tells you how long a particular file took to download. The longer the grey bar the longer it took to download.
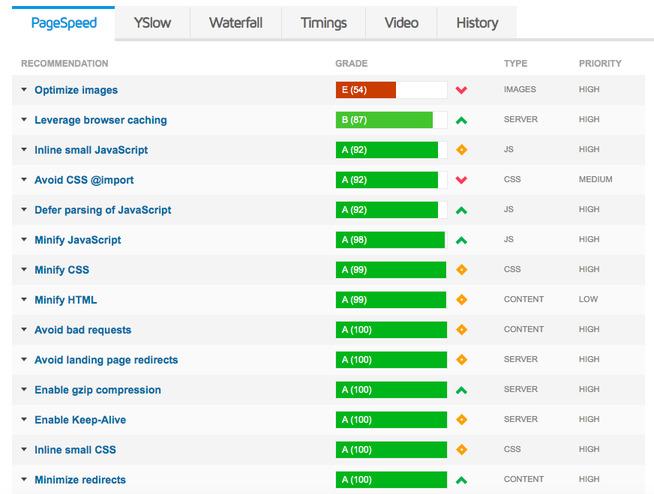
GTMatrix
An example of the Page Speed tab. Useful for optimising images especially with the ‘Serve Scaled Images’ tab.
How do we know if we can or should reduce the size of an image? If you go to the ‘Page Speed’ tab of the gtmetrix.com analysis then look for the ‘Serve Scaled Images’ area of the analysis. This will tell you all the images on the page which could be made smaller and also recommend what size you should reduce them to.
Most of the time you can take their recommendation however if you are, for example, a photographer then you may want to double it. This keeps the high resolution and detail that some may require. I think in most cases you can take their recommendation.
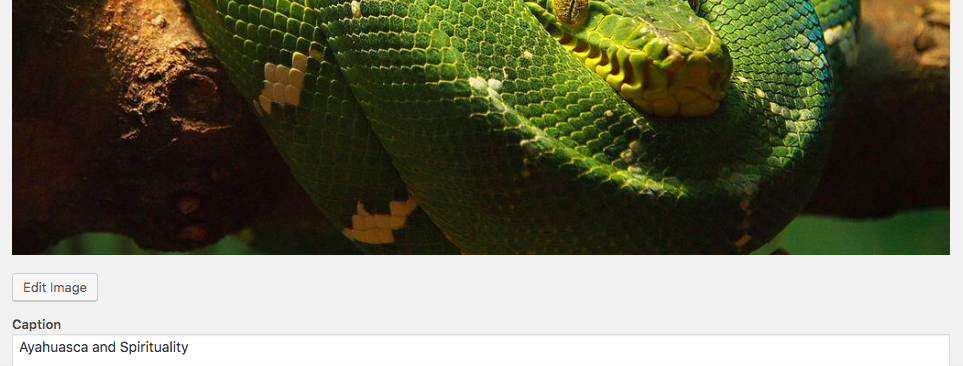
Once you know how big you’d like to have your image find the image in your WordPress Media Library and use its built-in image resizing feature to resize the image to the new size. To do so you can,
- navigate to the image in the Media Library (you might have to search for it) and click on it. Then click ‘Edit’ twice to get to the scale image area.
Find Image
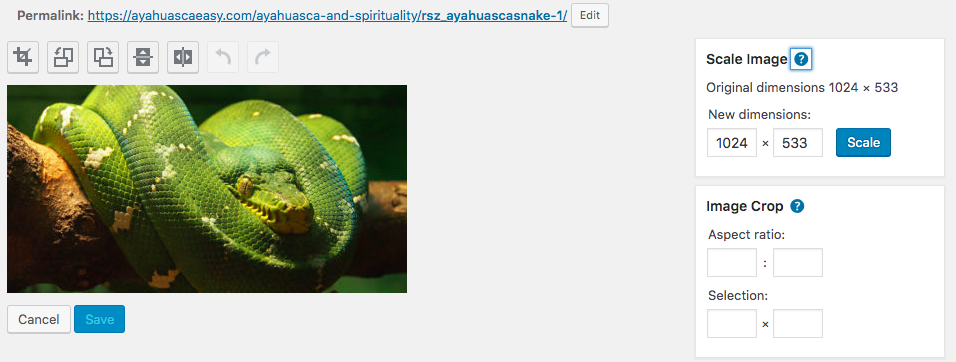
- Once you’ve clicked edit you will see the image in the popup and there will be another ‘Edit Image’ button just like below. Click this.
Edit Image
- Under the ‘Scale Image’ heading there are two input fields for width and height and then enter the width you have decided on and hit save.
- You might need to re-add this new image to your page as resizing it creates a different URL than the original.
- If you are using the ‘Page Speed’ tab method to find images to resize then be aware that it might not pick up background images. If your page uses background images you can find them in the waterfall tab instead and resize them also. Often around 1400px wide will work for most large and important images like this.
- If doing this manually and you have a lot of images you might want to use the Short Pixel plugin [https://wordpress.org/plugins/shortpixel-image-optimiser/] which will do this automatically for you. Be cautious though as it may miss some images. If you run it you can use the waterfall tab to see anything that it missed.
Stage 3 – Re-Test:
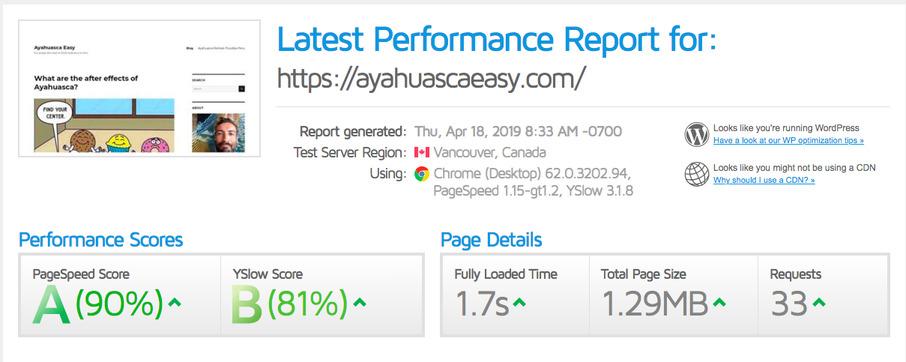
Test Performance Speed up your WordPress Site
An example of the possible results after you have optimized.
We’ve done quite a lot of work here now so let’s do another gtmetrix.com analysis. Compare it to your first initial test and see how much you have saved. It should be fairly significant by now.
If you have a load time of fewer than 3 seconds then you are doing a decent job but be aware that you are probably doing this on a laptop with a decent connection.
You should understand that the load time you see in the analysis is for your particular device and connection as well. It’s possible that there is also a user out there who is using your site on mobile phone with a bad connection (perhaps at an airport) and so feel free to go further with the analysis.
How can I go further you say? Well, there are further resources you could look to disable or reduce the need for like fonts and possibly some of the biggest gains could be had by moving your server or simply adding gzip compression and caching.
If you would like to learn more about that then please follow second part of this article:
Speed up your WordPress Site – No Coding Required – Part 2