Simple Guide to Learn Spring Boot Actuators with Example – Source Code on GitHub
In this article, we will understand the Spring Boot Actuators. We will go through the implementation and basic usage of this fantastic Spring Boot feature.
Softwares used
- Spring Boot 2.0.2.RELEASE
- Java 8
- Eclipse
- Maven
What is Spring Boot Actuators?
When a large scale enterprise application is running then the operations team is always worried about its health parameters. They have to keep a constant tab on whats working and what is not working? Whether the application is up or down. In general scenario development team can write logic for such endpoints and can expose them but it takes a lot of efforts.
For such scenarios, Spring Boot Actuators comes very handily. Just by adding some dependencies in your POM, your application can have out of the box features that will help you monitor your application environment. You can expose these features as HTTP endpoints and access via the web.
Enabling Actuators
For enabling Spring boot actuator following dependencies need to be added in the POM file. By adding below dependency, a user can access all 16 actuator endpoints.
|
1 2 3 4 |
<dependency> <groupId>org.springframework.boot</groupId> <artifactId>spring-boot-starter-actuator</artifactId> </dependency> |
Accessing Actuator Endpoints
After you add above dependency and start your application, you can access the list of all endpoints at http://localhost:8080/actuator
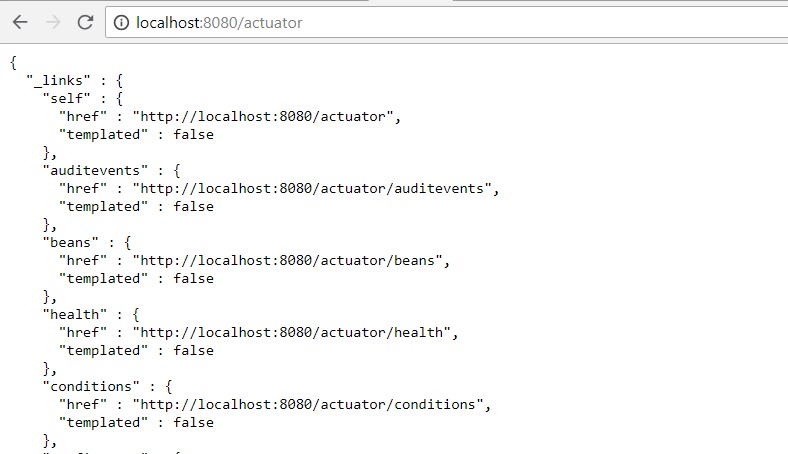
Below are some major endpoints:
- actuator: It provides a hypermedia-based discovery page for the other endpoints. It is required to have Spring HATEOS on the classpath to enable it.
- beans: It displays complete beans configured in the app.
- health: It shows information about application health.
- info: It displays arbitrary application info.
- metrics: It shows metrics information for the current application.
- trace: It displays trace information for last 100 HTTP requests by default can be configured further.
- loggers: It shows the configuration of loggers in the application.
- env: It explains properties from the Configurable environment in the scope of Spring.
All endpoints and detail information for those can be furnished from official page.
Changes have been introduced in Spring boot 2.0.0
Here is a catch since the release of Spring boot 2.0.0. Spring ensures that all points cannot be accessed directly and includes some other securities relevant updates as well. Following changes have been introduced in Spring boot 2.0.0.
- /health, /metrics etc. are no longer available at the default root context. They are available from now on at http://{host}: {port}/actuator.
- Response from /actuator endpoint is by default HATEOAS enabled. Prior to Spring Boot 2, this was the case only if HATEOAS is on the classpath and explicitly enabled in application.yml.
- Only the /health and /info endpoints are exposed, regardless of Spring Security being present and configured in your application.
- All endpoints but /shutdown are enabled (though only /health and /info are exposed)
Please refer migration guide for detailed information.
Security for Endpoints
There are some endpoints those are pertaining to critical information and we don’t want to expose for other roles who are not intended to have such information.
We can add authorization here or we can stop exposing sensitive endpoints by making it false. For authorization we have to use spring security for that we need to add following dependency.
|
1 2 3 4 |
<dependency> <groupId>org.springframework.boot</groupId> <artifactId>spring-boot-starter-security</artifactId> </dependency> |
Including above dependency, Spring security start acting and use in-built form based authorization with the configured user and a password.
So due to this, we can have prime role of ADMIN and ACTUATOR who are authorized to get access of sensitive endpoints. You also need to add below supporting configuration in an application.properties file.
|
1 2 3 4 5 6 7 |
management.endpoints.web.exposure.include=* management.security.enabled=true security.basic.enabled=true security.user.name=act security.user.password=act management.security.roles=ACTUATOR management.context-path=/actuator |
You can also include a list of required endpoints separated by a comma (,). as
|
1 |
management.endpoints.web.expose= health, beans, trace, info, metrices |
Customizing an Endpoint
Spring also provides adding custom endpoints if you have any application specific feature that you want to exapose and monitor. Just add a @Bean annotated with @Endpoint, In this class any methods annotated with @ReadOperation, @WriteOperation, or @DeleteOperation are automatically exposed over JMX and, in a web application, over HTTP as well. Endpoints can be exposed over HTTP using Jersey, Spring MVC, or Spring WebFlux.
|
1 2 3 4 5 6 7 8 9 10 11 12 |
@Component @Endpoint(id = "myfeatures") public class CustomFeatureEndPoint { private Map<String, Object> features = new ConcurrentHashMap<>(); @ReadOperation public Map<String, Object> features() { features.put("customFeature", "Hello World!"); return features; } } |
Output: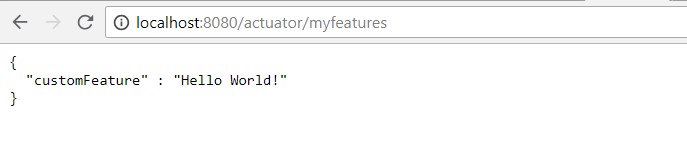
Conclusion
This article briefly explains What is Spring Boot Actuators, What is it’s use and how you can integrate with your application easily.
You can download the reference code from our GitHub repo.
Download Code


The linked migration guide says:
There is no longer a separate security auto-configuration for the Actuator (management.security.* property are gone).