WebSocket Application With Spring Boot Step By Step – Source Code On GitHub
WebSocket is used to develop two-way communication between server and browser. For example, in a chat application, if a user sends a message to a different user, the application sends that message to the server first and the server informs the application of the second user . If we don’t use WebSocket, the application or the client will have to pull the server data continuously for any new updates.
WebSocket Application With Spring Boot:
In Sprint Boot, we can easily create a WebSocket application. In this tutorial, I will show you how to create a WebSocket server in Spring boot. We will learn how to connect and disconnect from a socket server and how to send a simple text message. The client will subscribe to the server, it will accept a string and push a separate string to the subscriber client.
Configuration :
In this example, we are using IntelliJ-IDEA IDE with Gradle build system to create the application. You can follow the same process to create it on a maven build system.
Create one Basic app :
Let’s create one basic Spring boot application. Create one basic Spring boot application using start.spring. In this example, we are using Gradle but you can also use Maven as the build system. Open the application on your favorite editor before moving to the next step.
We will use WebSocket in this application.
Adding dependencies :
Open your project level build.gradle file and add the following dependencies :
|
1 2 3 4 5 6 7 |
dependencies { implementation 'org.springframework.boot:spring-boot-starter-websocket' implementation 'org.webjars:stomp-websocket:2.3.3' testImplementation 'org.springframework.boot:spring-boot-starter-test' } |
Note that you can use the same dependencies for a maven project as well and the version may be different than the above we are using at the time of writing this article.
Let’s build the App :
We need to create four components in the application.
- Model class to hold the type of data
- A controller class to define the routes
- Configuration class to configure spring to enable WebSocket and STOMP messaging
- Browser client or an HTML file and a javascript file for user interaction.
We will create each of these components one by one :
1. Model class :
We need two model classes. The controller will get the data as a Java object, modify it and returns one new Java object. This new object will be shown to to the user.
The service gets STOMP messages whose body is a JSON. It uses the model class to model this object. Create one file InputMessage.java inside your project :
|
1 2 3 4 5 6 7 8 9 10 11 12 13 14 15 16 |
public class InputMessage { private String message; public InputMessage(String message) { this.message = message; } public String getMessage() { return message; } public void setMessage(String message) { this.message = message; } } |
This is the input message class. Once the service will receive that message, it will process it and send back a different model with a different class :
|
1 2 3 4 5 6 7 8 9 10 11 12 13 14 15 16 |
public class OutputMessage { private String message; public OutputMessage(String message){ this.message = message; } public void setMessage(String message) { this.message = message; } public String getMessage() { return message; } } |
The return value is in JSON format. Spring will use the Jackson JSON library for this conversion. Both of these classes are POJO.
2. Controller class :
Second part is to create the message handling controller class. Create one class called ‘MessageController.java’ with the below code :
|
1 2 3 4 5 6 7 8 9 10 11 12 13 14 15 16 17 |
package com.demo.socket; import org.springframework.messaging.handler.annotation.MessageMapping; import org.springframework.messaging.handler.annotation.SendTo; import org.springframework.stereotype.Controller; @Controller public class MessageController { @MessageMapping("/") @SendTo("/chat/sendMessage") public OutputMessage sendMessage(InputMessage message) { return new OutputMessage("New message " + message.getMessage()); } } |
This class has one method defined called ‘sendMessage’. It takes one ‘InputMessage’ object and returns one ‘OutputMessage’ object.
3. Configuration class :
The configuration class should implement the ‘WebSocketMessageBrokerConfigurer’ class. Create one file Config.java with the below code :
|
1 2 3 4 5 6 7 8 9 10 11 12 13 14 15 16 17 18 19 20 21 22 |
import org.springframework.context.annotation.Configuration; import org.springframework.messaging.simp.config.MessageBrokerRegistry; import org.springframework.web.socket.config.annotation.EnableWebSocketMessageBroker; import org.springframework.web.socket.config.annotation.StompEndpointRegistry; import org.springframework.web.socket.config.annotation.WebSocketMessageBrokerConfigurer; @Configuration @EnableWebSocketMessageBroker public class Config implements WebSocketMessageBrokerConfigurer { @Override public void configureMessageBroker(MessageBrokerRegistry registry) { registry.enableSimpleBroker("/chat"); registry.setApplicationDestinationPrefixes("/app"); } @Override public void registerStompEndpoints(StompEndpointRegistry registry) { registry.addEndpoint("/chat-websocket").withSockJS(); } } |
Make sure that your SpringBootApplication class is configured like below :
|
1 2 3 4 5 6 7 8 9 10 11 12 |
import org.springframework.boot.SpringApplication; import org.springframework.boot.autoconfigure.SpringBootApplication; @SpringBootApplication public class SocketApplication { public static void main(String[] args) { SpringApplication.run(SocketApplication.class, args); } } |
That’s it. With these five files, our socket application is ready. The only thing left is the front end part of the HTML, CSS changes.
Browser client :
We need one HTML and one java-script file to create the basic app. Both files should be placed in the ‘resources/static’ folder. Create one ‘index.html’ file with the below code :
|
1 2 3 4 5 6 7 8 9 10 11 12 13 14 15 16 17 18 19 20 21 22 23 24 25 26 27 28 29 30 31 32 33 34 35 36 37 38 39 40 41 42 43 44 45 46 47 48 49 50 51 52 53 |
<!DOCTYPE html> <html> <head> <title>Hello WebSocket</title> <link rel="stylesheet" href="https://stackpath.bootstrapcdn.com/bootstrap/4.3.1/css/bootstrap.min.css" integrity="sha384-ggOyR0iXCbMQv3Xipma34MD+dH/1fQ784/j6cY/iJTQUOhcWr7x9JvoRxT2MZw1T" crossorigin="anonymous" /> <script src="https://ajax.googleapis.com/ajax/libs/jquery/3.4.1/jquery.min.js"></script> <script src="https://cdnjs.cloudflare.com/ajax/libs/sockjs-client/1.3.0/sockjs.js"></script> <script src="https://cdnjs.cloudflare.com/ajax/libs/stomp.js/2.3.3/stomp.js"></script> <script src="/app.js"></script> </head> <body> <div class="container"> <div> <label>Press start to connect and stop to disconnect :</label> </div> <div style="margin-top: 5px;"> <button id="button-start" type="button" class="btn btn-primary"> Start </button> <button id="button-stop" type="button" class="btn btn-danger"> Stop </button> </div> <div style="margin-top: 15px;"> <p id="infotext" class="text-info">You are not connected</p> </div> <div id="input-group" class="input-group mb-3" > <input id= "message-input" type="text" class="form-control" placeholder="Enter a message here" aria-describedby="button-addon2" /> <div class="input-group-append"> <button class="btn btn-outline-secondary" type="button" id="button-send" > Send </button> </div> </div> <p id="message" class="text-success"></p> </div> </body> </html> |
Inside the same folder, create one app.js file :
|
1 2 3 4 5 6 7 8 9 10 11 12 13 14 15 16 17 18 19 20 21 22 23 24 25 26 27 28 29 30 31 32 33 34 35 36 37 38 39 40 41 42 43 44 45 46 47 48 49 50 51 52 53 |
var stompClient = null; function resetProperties(connected) { $("#button-start").prop("disabled", connected); $("#button-stop").prop("disabled", !connected); if (connected) { $("#input-group").show(); $("#infotext").html("You are connected"); } else { $("#input-group").hide(); $("#infotext").html("You are not connected"); } } function connect() { var socket = new SockJS('/chat-websocket'); stompClient = Stomp.over(socket); stompClient.connect({}, function (frame) { resetProperties(true); console.log("reset..."); stompClient.subscribe('/chat/sendMessage', function (greeting) { showMessageOnPage(JSON.parse(greeting.body).message); }); }); } function disconnect() { if (stompClient !== null) { stompClient.disconnect(); } resetProperties(false); } function sendMessage() { stompClient.send("/chat/sendMessage", {}, JSON.stringify({'message': $("#message-input").val()})); } function showMessageOnPage(message) { $("#message").append("" + message + ""); } $(function () { $("form").on('submit', function (e) { e.preventDefault(); }); resetProperties(false); $( "#button-start" ).click(function() { connect(); }); $( "#button-stop" ).click(function() { disconnect(); }); $( "#button-send" ).click(function() { sendMessage(); }); }); |
Your application is ready at this point. Start it and open ‘localhost:8080’ on a server. It will show a screen like below :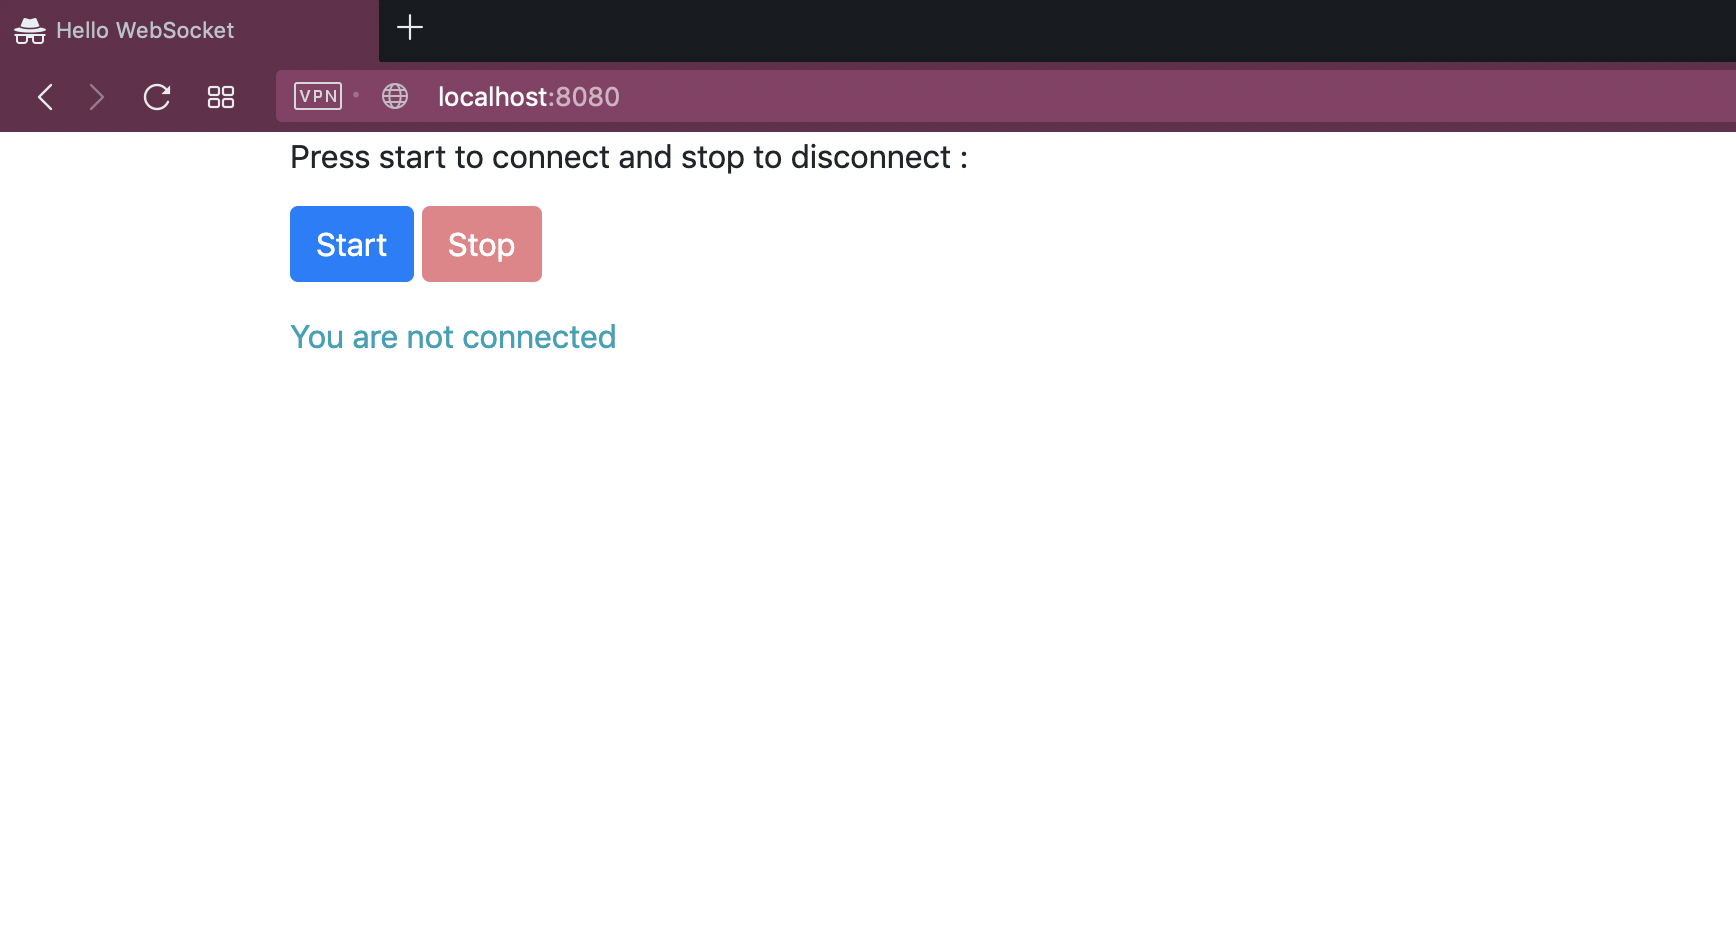
 Click on the start button. It will change the message as ‘connected’ and one input field will be shown with a ‘send’ button.
Enter anything in the input field and hit the ‘send’ button, the receiver will receive that message via socket and print it out at the bottom :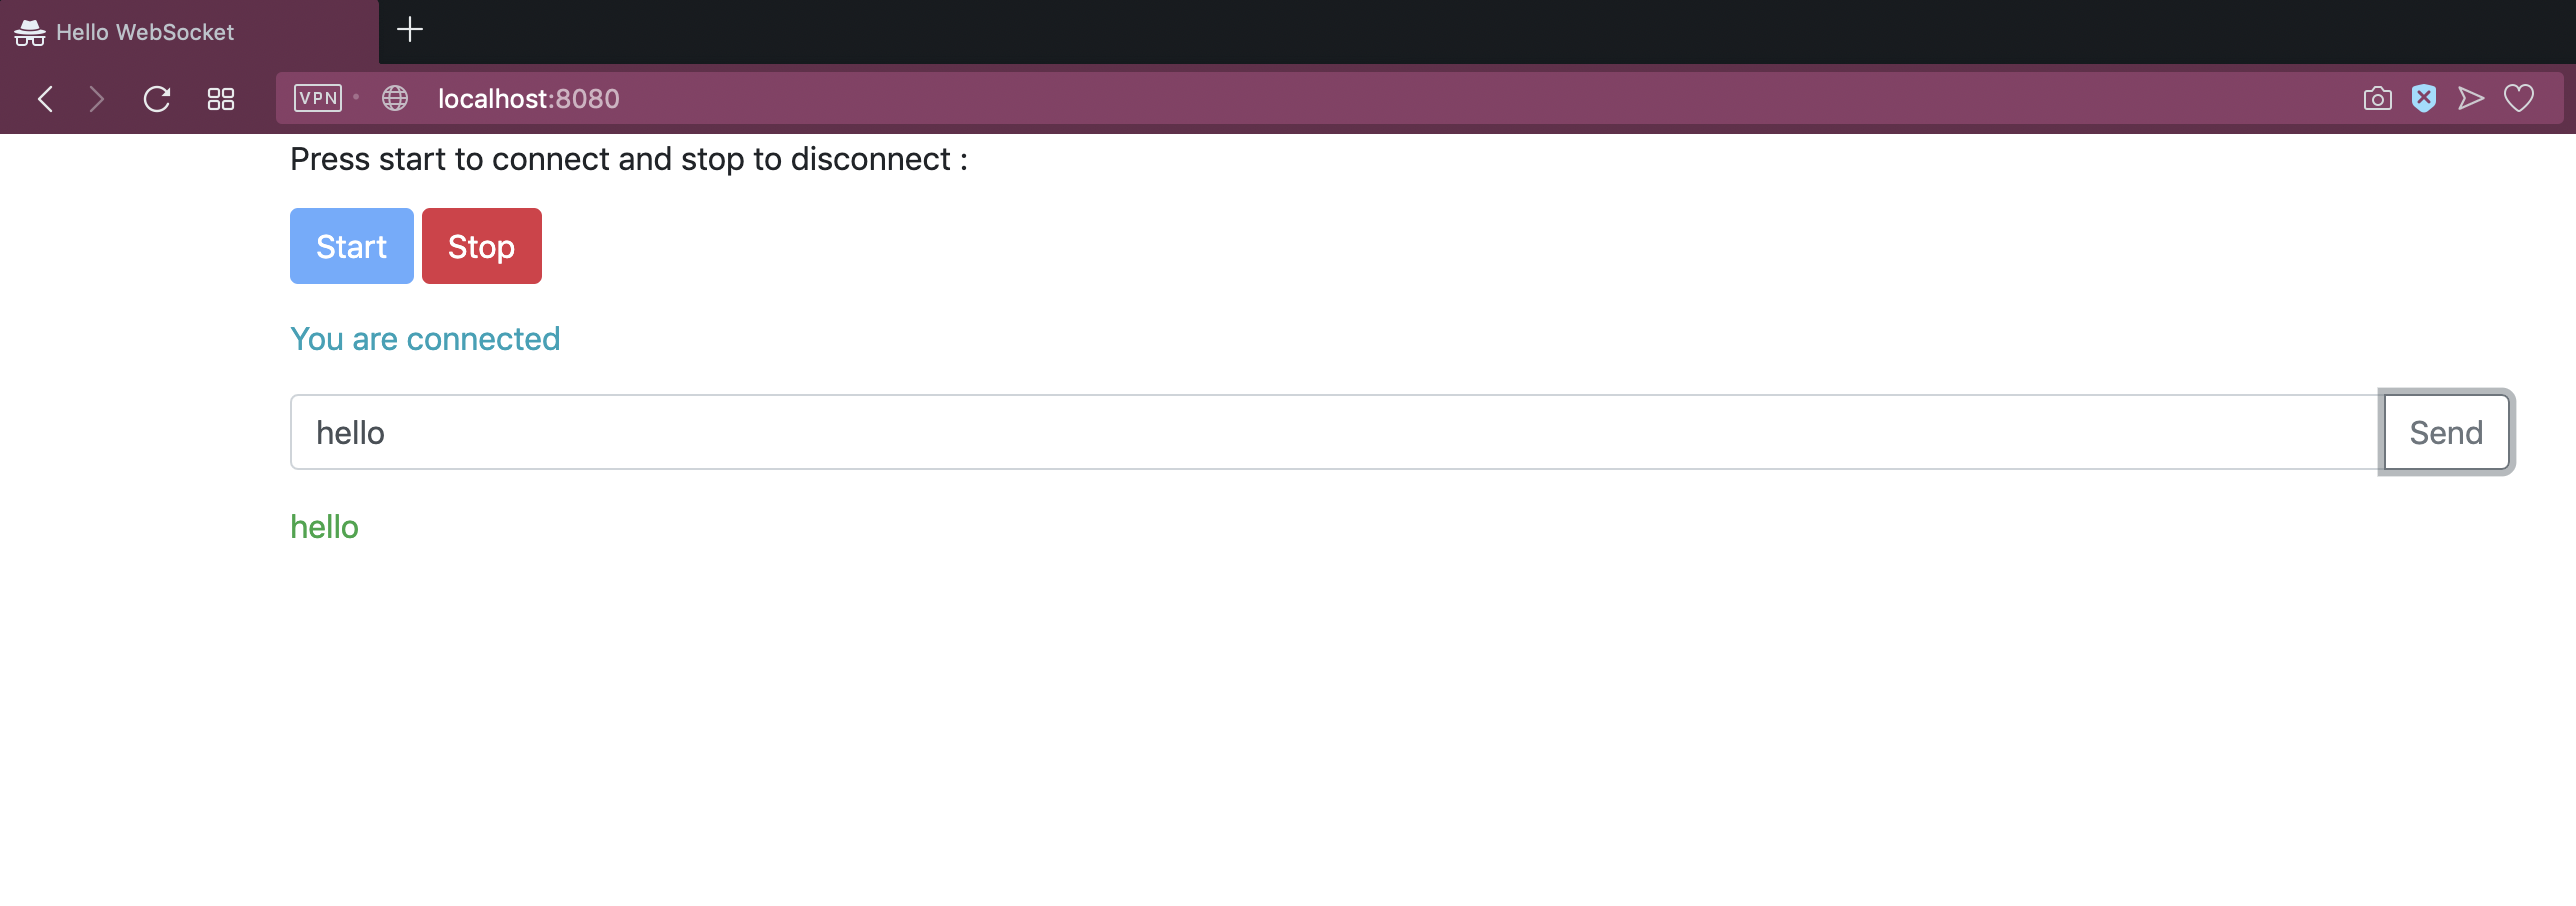
 WebSocket Vs REST :
WebSocket and REST are two different concepts. Following are the main differences between REST and WebSocket :
- WebSocket is a stateful protocol but REST is a stateless protocol.
- REST applications are normally used for occasional communication but WebSockets are ideal for continuous communication
- With REST applications, a new TCP connection is used for each request but WebSocket uses the same TCP connection over the life of the socket connection.
- Communication cost is lower for WebSocket as compared to REST APIs
- In WebSocket, it is possible for both server and client to send and receive data at the same time
WebSocket has few advantages than RESTful APIs but it is not a direct replacement for REST. If multiple clients need to be synced at the same time, ‘WebSocket’ is the best option. But, if the clients are only reading and writing data to the server independent of each other, REST will do the work.


is ‘Download’ button not present?
Excellent article. I’m just missing source code that is mentioned in the title. Where can I find it?
Check at the end of the article. You will find ‘Download’ button.
Please let me know if it works.