Automation Testing With Cypress – Simple and Easy Tutorial For Beginners
The biggest challenge we QA Engineers face or at least I always encounter is those annoying waits, sleep, elements not present on the page, or slow loading of pages.
To be frank, I am also new to Cypress since I have always worked with Selenium Webdriver but at the same time excited to explore this modern, non-selenium based tool and try front-end automation testing with Cypress.
As we know Selenium is made of libraries, APIs, and wrappers to make it intractable with browser elements and control actions. But Cypress, on the other hand, uses its own DOM manipulation techniques to control the browser actions. In fact, the browser is also custom made by Cypress to run the tests.
Automation Testing With Cypress:
Cypress is technically just another automation testing tool that does not use Selenium Webdriver. This makes it a good choice for handling dynamic web pages for writing e-2-e, integrations, or unit tests.
According to Cypress’s official website, Cypress is both fundamentally and architecturally different than Selenium and solves the limitations like reliable, fast, and writing scalable tests.
If you’re familiar with JavaScript, it will be an easy transition. The tests in Cypress are implemented on Mocha and Chai syntax. The bad thing is, it’s only available for Chrome as of now, but hopefully more browsers to join.
Getting Started With Cypress:
Before we start, make sure you have NodeJS, NPM, and VS Code installed on your system.
We will create our project folder named “cypress-tests”. Now open a terminal, go to the project folder, initialize npm (npm init) and we can start the installation process.
Read: Simple CRUD application using NodeJS, Express and MongoDB
Install Cypress
Using npm install
|
1 |
npm install cypress --save-dev |
Using yarn add
|
1 |
yarn add cypress --dev |
Once you’ve installed Cypress successfully, you need to open cypress using command – ./node_modules/ .bin/cypress open and then you should see the below screen.
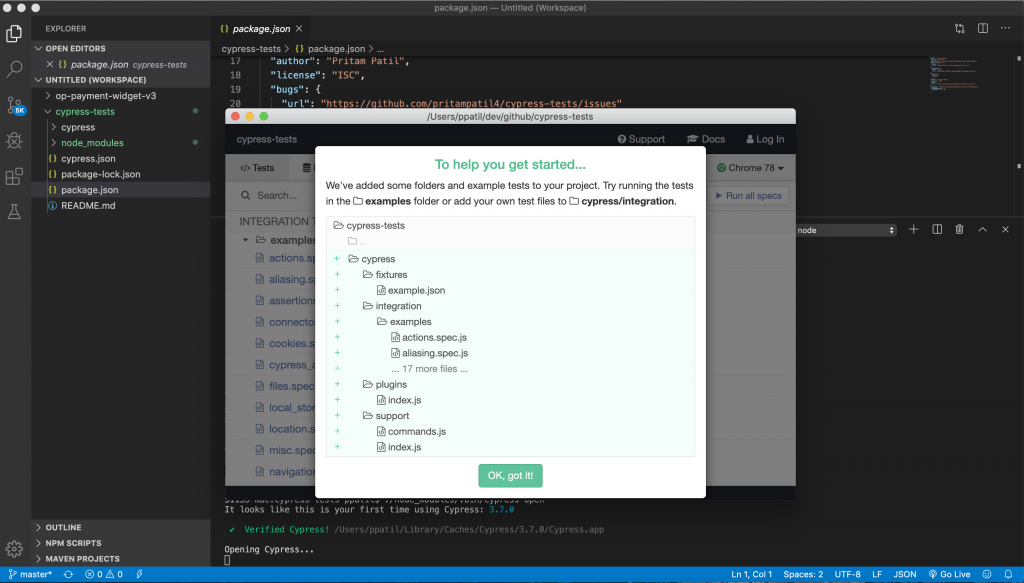
As you can see Cypress comes with some default folders and its structure can be seen above. Let’s see why do we need this folder for, but the actual use we will see in the next article. Sign up for the newsletter to keep yourself updated.
Cypress testing folder structure:
Fixtures – In case we have external data which is static in nature to be used in our tests, we can put that inside
|
1 |
cypress/fixtures/your_file_name.json |
Integration – In this folder we write all our tests. Cypress test runner only runs tests which are inside this folder. The tests can be written in .js, .jsx, .coffee and .cjsx (deprecated).
Plugins – If we want to add functions or code which we want to run before every file or test configuration, we can put that inside
|
1 |
cypress/plugins/your_file_name.js |
Use cases can be read here – https://docs.cypress.io/guides/tooling/plugins-guide.html#Use-Cases
Support – Another option you could use to define the configurations or override the Global variables in Cypress. You can read more about configurations default value here – https://docs.cypress.io/guides/references/configuration.html#Folders-Files
Writing First E-2-E Cypress Automation Test:
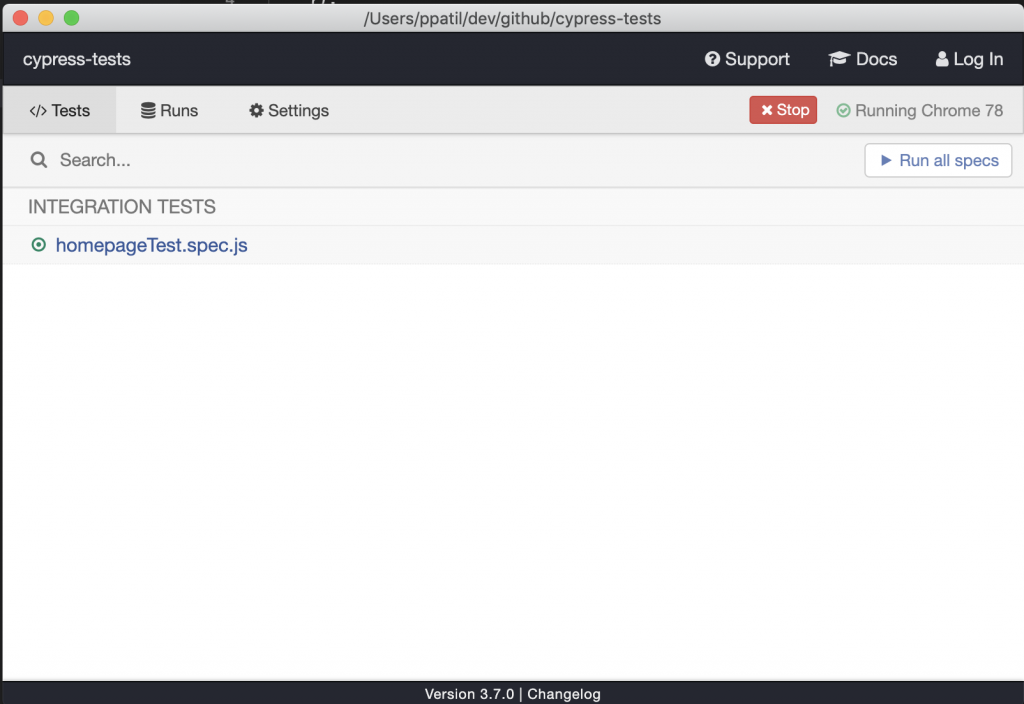
Once everything is set-up and we got the understanding of folder structure, we will go to Integration folder, there you can see already written default tests from Cypress. You can keep and reuse them, but I will just delete them all and write a simple test.
Test-case 1: Open Home Page for Opencodez.com
Go to cypress/integration folder and create file, homepageTest.spec.js
|
1 2 3 4 5 6 7 8 9 10 11 12 13 14 15 |
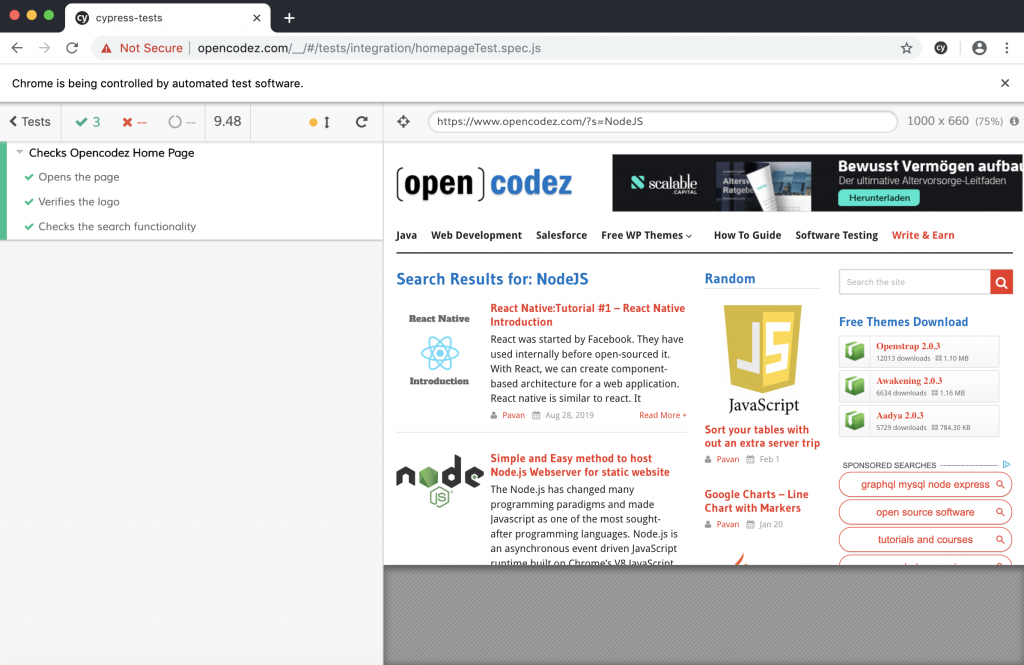
describe('Checks Opencodez Home Page', () => { it('Opens the page', () => { cy.visit('https://www.opencodez.com') }) it('Verifies the logo', () => { cy.get('#logo').should('be.visible') }) it('Checks the search functionality', () => { cy.get('#search-4').type('NodeJS'); cy.get('#search-image').click(); }) }) |
Good thing is, if you already know or worked with Mocha or Chai, the tests can be written in a similar style. Cypress provides us with Chai’s BDD and TDD assertion styles with Mocha’s interface such as describe(), context(), it(), specify(). You can use any of these of your choice to write tests.
Now to run the test, you should see the tab where we can click on a particular test to run it.
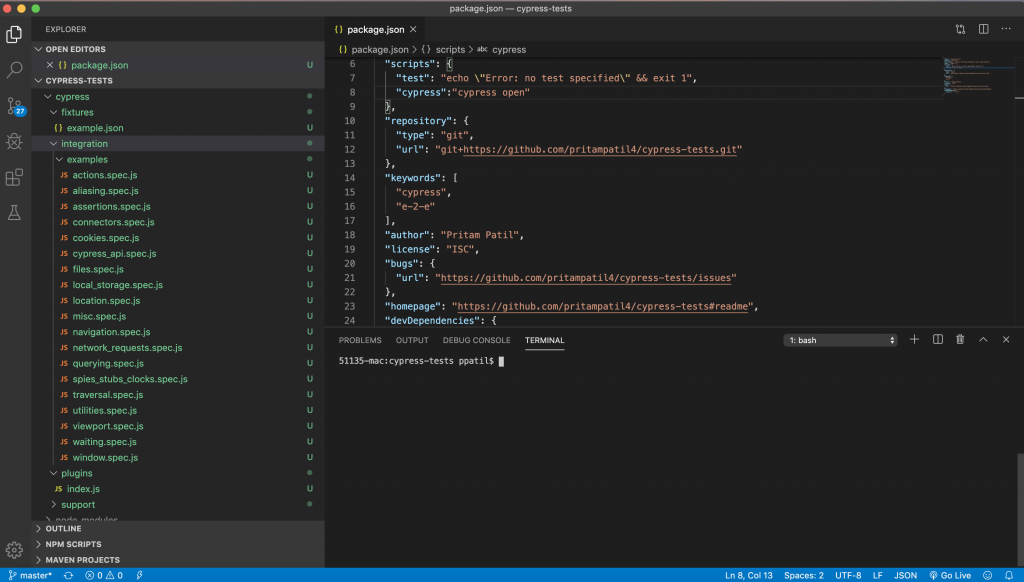
I have added a script to run the test from npm, go to package.json file of your project, under scripts, add – cypress:”cypress open”. Now on, to run you just need npm run cypress command from a terminal.
You should see the following screen on your computer with Cypress opening the browser and running the tests 🙂
Conclusion:
As you can see, it’s very easy to test and get started with Cypress. But I would like to mention some important aspects of testing which are not covered in Cypress –
- It only runs on the Chrome Browser.
- Chrome browser is also custom used by Cypress, so the versioning might be a problem.
- Not able to do cross-browser testing. Ex: Integration with Sauce Labs or BrowserStack.
- Only available for web applications.
Hope this article will help you to write your first front-end automation testing with cypress. Go ahead download the code and start coding. Let me know if you have any questions or suggestions in the comments.
Download Code

Thanks for the clarification!