How to Build and Deploy Web Service and Client in Java
Web Services are most widely implemented examples of Service Oriented Architecture (SOA). A service contract is defined with the help of SOAP and Web Service Definition Language (WSDL) and that is published for other applications to use. In this article we will see how we can create web service and web service client in java.
Software used in this example
- Java 6
- Eclipse
- Apache Tomcat
Lets create a “HelloServer” project for our Web Service. This project will act as our server who will provide the service. In your eclipse IDE select New -> Project -> Dynamic Web Project. Put in the name for project as below.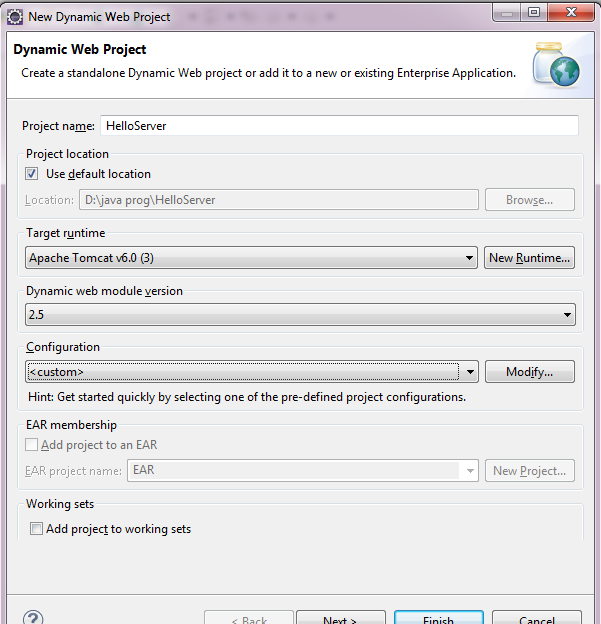
We need to add web services capability to our project. For that we need to do some configuration. In above screen click on the Modify button for configuration. Below screen will appear.
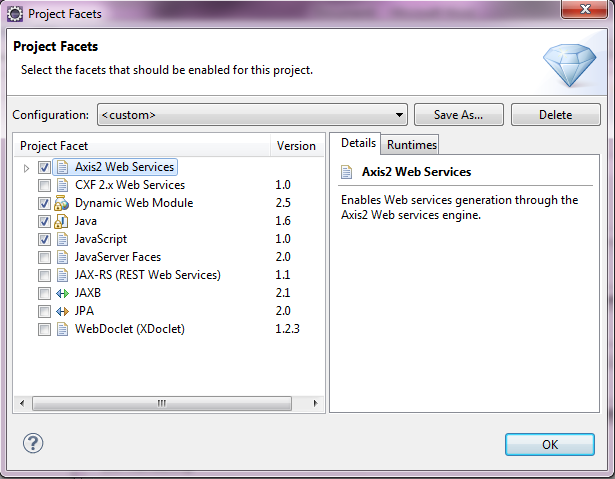
In above configuration make sure the Axis2 Web Service option is checked along with others. We need to have Dynamic Web Module version as 2.5. Also in Runtime tabs please select Runtime as Apache Tomcat 6.0 and Above. Click Ok. You will be redirected back to previous screen, there click on Finish with taking default options for other configurations and paths.
Once you are done, you can see the your project in eclipse IDE as below. Post this we will add a sample class MyHellowebService.java. We can always add a package first and then class to it but for tutorial purpose lets add it to base package directly. 
Below is sample code that can be put in to our newly added class.
|
1 2 3 4 5 6 7 8 |
public class MyHelloWebService { public String greetingMethod(String Name) { return("Hello "+Name+" How are you?"); } } |
To convert our class in to web service we need to do following steps –
- Click on File -> New – > Web Service or You can use shortcut to open Web Service and choose Web Service Option.
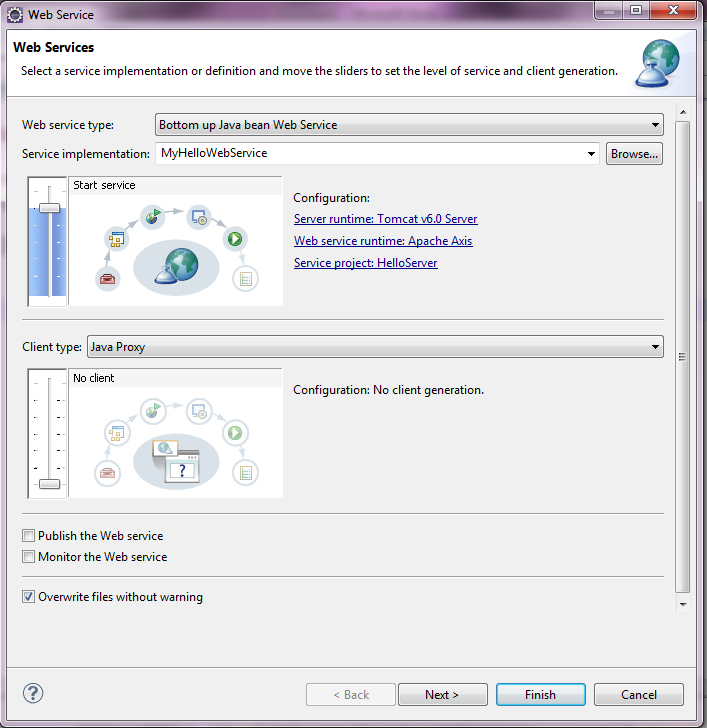
- In Server Implementation select the name of the class as MyHelloWebService … If you didn’t find name of the class click on Browse and then select the name of the class from the list.
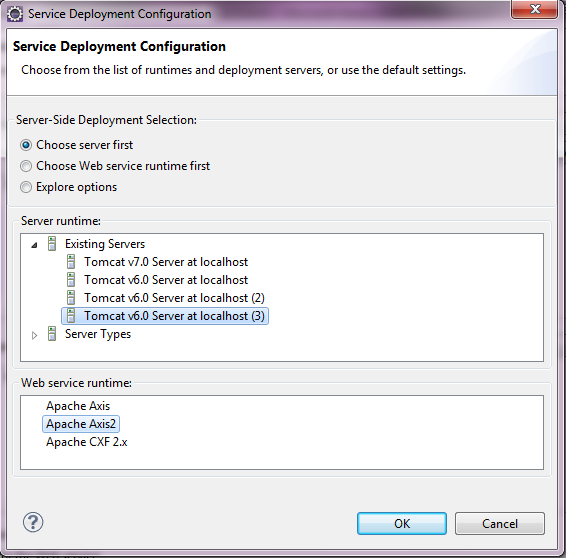
- Select Server Runtime : The instance of Tomcat Server you are using for developing web services
- Web Service Runtime : Apache Axis2 ( note you should have axis2-1.6.3 exe or you can download it from internet)
- Click on Ok -> Next -> Click on Next and then Start Server
- The Tomcat server will be starting here. Then Click on Finished
- Eclipse will show you the list of available instance of server with state
Once this is done our server project will be deployed to our local tomcat and we can access that on port 8080 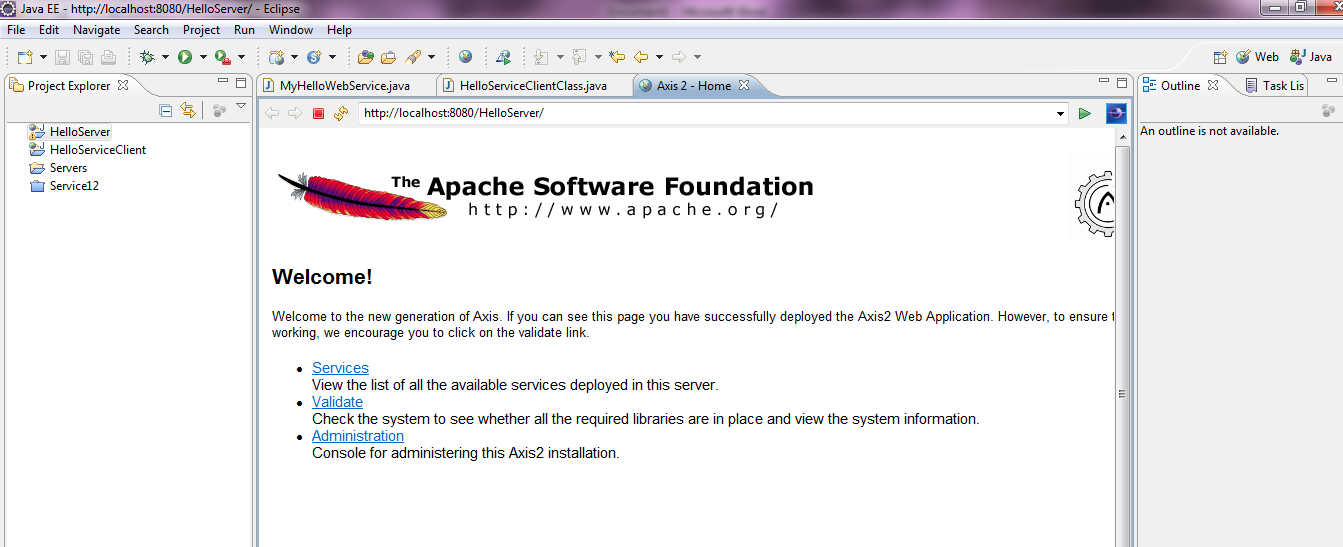
The Services link will have all the services that are deployed as part of our HelloServer project. If you click it, you will get the list as 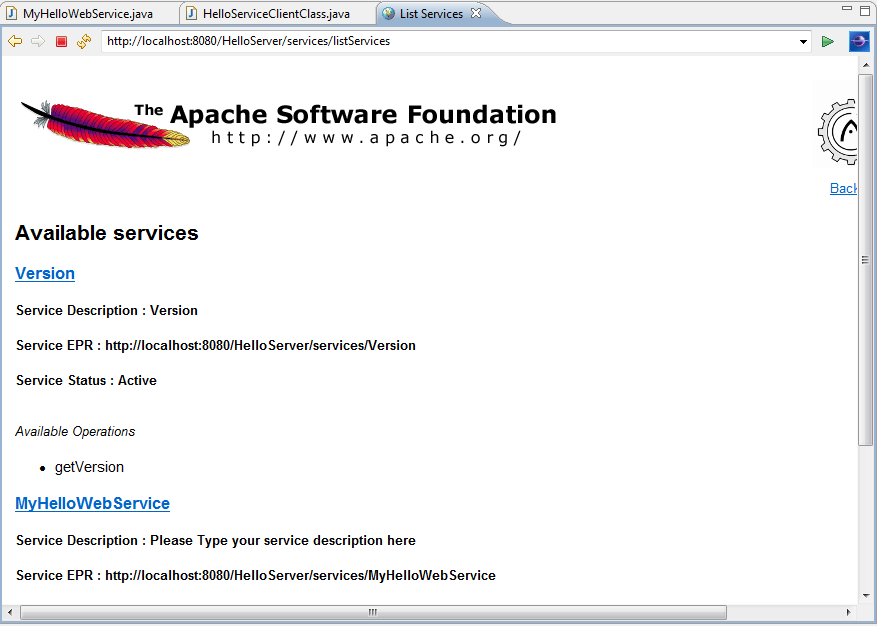
As mentioned earlier, the web service contract is published as wsdl which can be accessed via a url by appending ?wsdl at the end of our service endpoint. In our case the url will be as http://localhost:8080/HelloServer/services/MyHelloWebService?wsdl 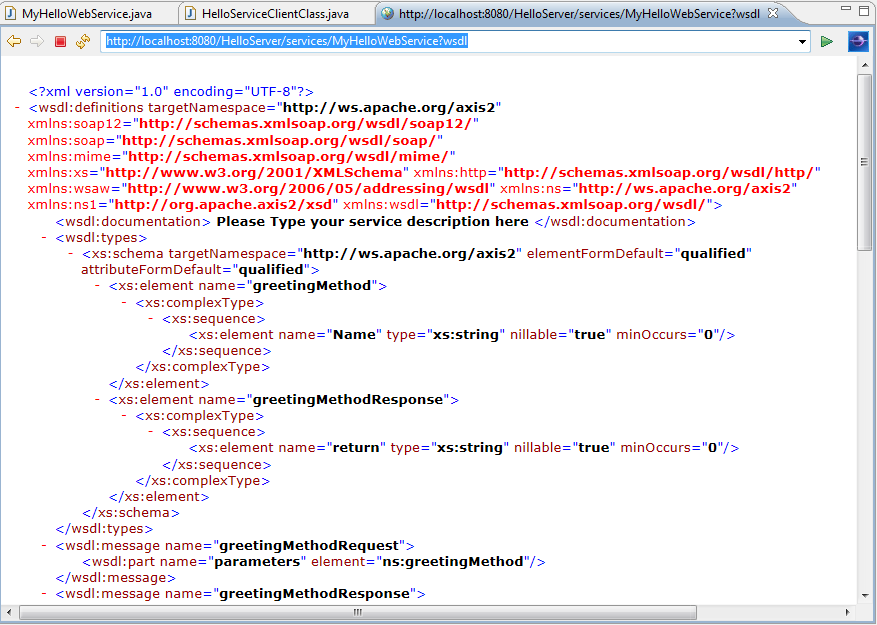
Now our Server is ready and we have published the wsdl. Lets prepare our web service client. We need to create one more dynamic web project named “HelloServiceClient”. Please follow the same steps we did for our server project. To add the capability of accessing web service to our project we need to generate web service stub code in our newly created client project. In order to do that, please follow steps given below
- Click on File-> New-> Others (Cntr+N) -> Web Service Client

- Click Next. In the next screen copy and paste the wsdl of our web service
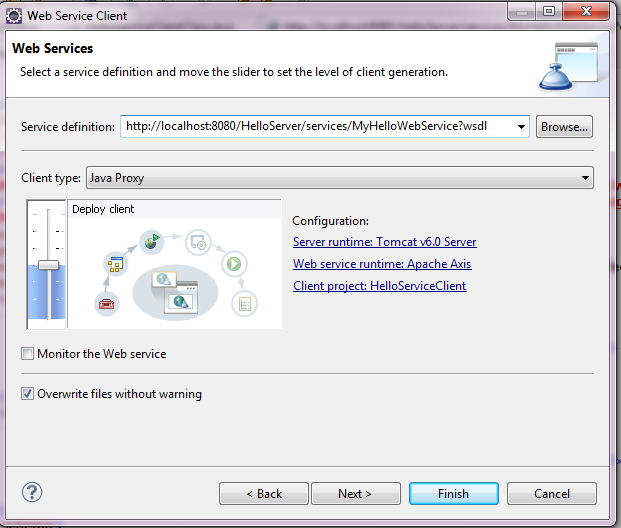
- Click on Server Runtime : and Select any Available instance of Tomcat server
- Click on Web Service runtime: Apache Axis2
- Click on Next following dialog window will appear.
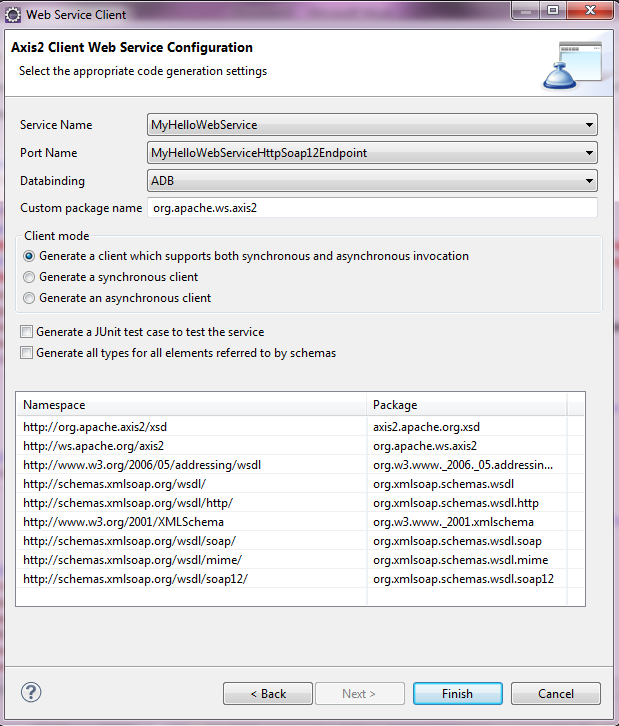
- Click on Finish. Now your Web client is linked with Web Service definition
Now we will add a new class to our client project that will actually try and call the web service. Remember when you did above steps the necessary stub classes are generated in our client project which we can directly use. We will add a new class as below which accepts an input from user and sends it to the service via call.
|
1 2 3 4 5 6 7 8 9 10 11 12 13 14 15 16 17 18 19 20 21 22 23 24 |
import java.rmi.RemoteException; import org.apache.ws.axis2.MyHelloWebServiceStub; import org.apache.ws.axis2.MyHelloWebServiceStub.GreetingMethod; public class HelloServiceClientClass { /** * @param args * @throws AxisFault */ public static void main (String [] args) throws RemoteException, IOException{ // TODO Auto-generated method stub // Create object of MyHelloWebService Class MyHelloWebServiceStub myService1 = new MyHelloWebServiceStub (); BufferedReader br=new BufferdReader (new InputStreamReader (System.in)); String strName =br.readLine (); GreetingMethod gm = new GreetingMethod (); gm.setName(strName); System.out.println (" +myService1.greetingMethod (gm).get_return()); } } |
Hope above server and client example helps you.


Hello am How to run HelloServiceClientClass.java
Give me an application regarding restful web services in which tomcat server we use
Nice one….
Thank you for review
Very nice article…with brief description .. thanks mam.
Thank you Vijaya
its very usefull…thanks Mam
Thank you Ashok for your review… Let me know if you need more information regarding same