
Recently Google has announced that Chrome will start showing xNOT SECUREx warnings for all HTTP pages it opens. It may not break your site, but its definitely going to have the impact on your users and SEO ranking. In this article, we will guide you on how to Move WordPress Site From HTTP to HTTPS for FREE.
The Opencodez is hosted on Linode with Apache and Ubuntu. But the steps will work just fine for other flavors of Linux OS and Apache.
Note: We are assuming you have a Shell access to your website. If not, please request your hosting provider to give you access.
1. Take Back Up
This is the most important step of your migration. You need to take backup of your complete website and database before you even think of migration. Make sure you take backup of your WordPress folders as they have your actual images, themes, and plugins.
2. Get Your SSL Certificate for Free
Now there are many organizations which can help you get the SSL Certificate for your website. They may charge you anything between $50 x $250 as yearly fees to provide you a certificate. In my opinion, if you are a banking or e-commerce website which accepts sensitive data like debit or credit card you can opt for the commercial paid certificate.
2.1 How to get your certificate for free?
Letâs Encrypt is a free, automated, and open certificate authority brought to you by the non-profit Internet Security Research Group (ISRG). This organization provides you with free certificates that are equally secure.
You can use the Lets Encrypt or Certbot (which internally connects with Lets Encrypt) to generate your certificate.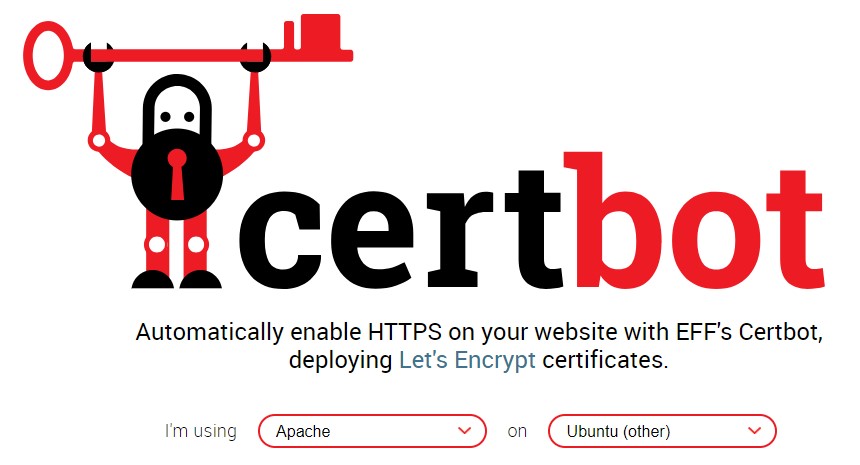
Just choose your web server and operating system. It will tell you the exact steps to install certbot.
After you install certbot run below command
./certbot-auto certonly -d www.opencodez.com -d opencodez.com
Make sure you use the domain names that you want to get the certificate. Please note that we are using certonly option, as we do not want anyone to change our Apache configuration.
After this, the utility will ask you on how you want to perform the authentication.
How would you like to authenticate with the ACME CA?
-------------------------------------------------------------------------------
1: Apache Web Server plugin - Beta (apache)
2: Spin up a temporary webserver (standalone)
3: Place files in webroot directory (webroot)
-------------------------------------------------------------------------------
Select the appropriate number [1-3] then [enter] (press 'c' to cancel): 3
Choose 3.
Then you have to provide the webroot for your site as
Input the webroot for www.yourdomain.com: (Enter 'c' to cancel): /www/yourdomain.com
Provide the root folder of your website.
If all goes well, you will see a message something like below
IMPORTANT NOTES:
 - Congratulations! Your certificate and chain have been saved at:
   /etc/letsencrypt/live/www.yourdomain.com/fullchain.pem
   Your key file has been saved at:
   /etc/letsencrypt/live/www.yourdomain.com/privkey.pem
   Your cert will expire on 2018-09-28. To obtain a new or tweaked
   version of this certificate in the future, simply run certbot-auto
   again. To non-interactively renew *all* of your certificates, run
   "certbot-auto renew"
The certbot has placed your certificate and key in the location mentioned above.
Notice that your certificate will expire in 3 months. But donxt worry. The certbot comes with a command that will renew your certificate in a moment. We will look into this later in the article.
3. Implement Your SSL Certificate
3.1 Update Virtual Host
So we have our certificate ready to use. Letxs change the virtual host to use port 443 and our new certificate.
 xVirtualHost *:443x
    ServerName www.yourdomain.com
    DocumentRoot /var/www/yourdomain.com/public_html
    ServerAlias yourdomain.com
    ErrorLog /var/www/yourdomain.com/error.log
    CustomLog /var/www/yourdomain.com/requests.log combined

    SSLEngine on
    SSLCertificateFile /etc/letsencrypt/live/www.yourdomain.com/fullchain.pem
    SSLCertificateKeyFile /etc/letsencrypt/live/www.yourdomain.com/privkey.pem

x/VirtualHostx
Check above, and make sure your host entry is updated with SSL certificate file and private key.
3.2 Add HTTP to WordPress Admin
Open wp-config.php in your WordPress and add below line just above it says Thatâs all, stop editing!.
define('FORCE_SSL_ADMIN', true);
3.3 Enable SSL Module
Before we restart Apache, make sure SSL module is enabled. You can use below command for that.
sudo a2enmod ssl
Restart Apache
sudo service apache2 restart
4. Update Site Address
Login to your WordPress Admin and changed site address as shown below. Make sure you use your correct domain with HTTPS

5. Update URLs in your contents
If you have existing contents then its very important to changes all yours in your posts, comments etc to use https. To do that we will use a very simple plugin Better Search Replace
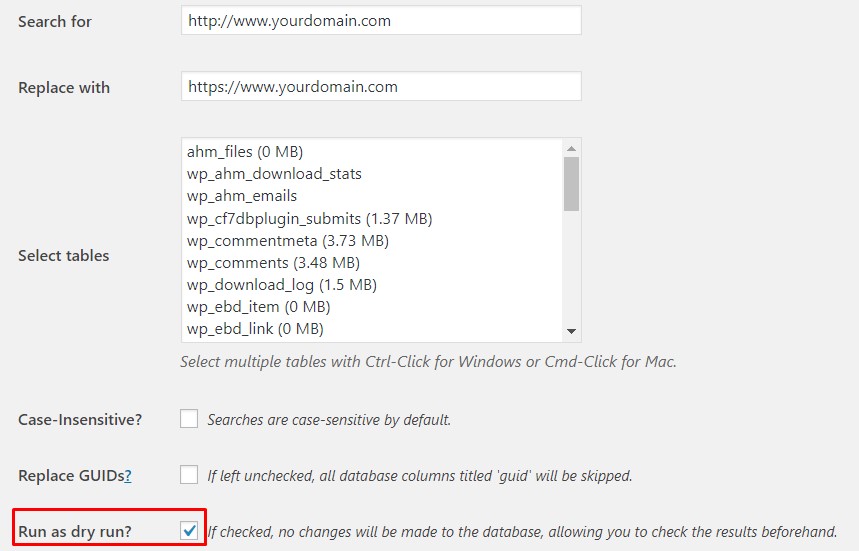
Search for your domain without https and replace it with correct domain along with https as shown above.
You can even try a dry run to see what all things going to change.
Most Important!! x Take Backup before you change
6. Set 301 Redirect for Old URLs
This is crucial as you donxt want your search rankings to suffer. You need to tell the search engine that your old URLs are now permanently moved and available on new shiny and secure address. You can implement it in two ways.
6.1 .htaccess
Open .htaccess from your WordPress root folder and add below to it.
xIfModule mod_rewrite.cx
 RewriteEngine On
 RewriteCond %{HTTPS} off
 RewriteRule ^(.*)$ https://%{HTTP_HOST}%{REQUEST_URI} [L,R=301]
x/IfModulex
6.2 Redirect in virtual hosts
If somehow above does not work for you then you can add an additional virtual host entry to server HTTP and from that redirect all your request to the new address. The Virtual host entry should look like
xVirtualHost *:80x
   ServerName yourdomain.com
   ServerAlias www.yourdomain.com
   Redirect 301 / https://www.yourdomain.com/
x/VirtualHostx
Replace yourdomain.com with the correct domain name.
7. Submit to Google Webmaster
Google treats your protocol change and new address. You need to add the new secure address of your https website to Google and any other Search engines you work with.
Congratulations!! At this point we have completely moved WordPress From HTTP to HTTPS.
8. Periodically renewing your certificate.
As mentioned above the Letxs Encrypt issues certificate that is valid for 3 months. You need to set up a process to renew them automatically.
For that add below command to your crontab
0 */6 * * * ./path/to/certbot-auto renew --quiet --no-self-upgrade
 Conclusion
In this article, we have step by step guide to move your WordPress site from HTTP to HTTPS.
Please comment or ask a question or two if you need any information.