

Every application be it desktop or web, needs to send some kind of notification via mail. The scenarios may differ as per requirements like registration mail, order confirmation or any batch job completion.
Java Mail Framework using Spring Boot
In this article, we will see a simple but powerful Java Mail sending framework using Spring Boot.
Software used for this example
- Java 1.8
- Spring Boot 1.5.2.RELEASE
- FakeSMTP
- Eclipse
As mentioned above we will be using Spring Boot Mail to provide all the boilerplate code and configuration. Below is the pom file entry for mail
xdependencyx
  xgroupIdxorg.springframework.bootx/groupIdx
  xartifactIdxspring-boot-starter-mailx/artifactIdx
x/dependencyx
We will simply build the simple template system on top of that. This Java Mail Framework will be able to send HTML as well as Plain text emails. You can download source code from here.
As a basic requirement for any mail, we need few details like to, from, subject, message. To hold this information we will define a simple java bean as below
public class Email {

	private String from;

	private ListxStringx to;

	private ListxStringx cc;

	private String subject;

	private String message;

	private boolean isHtml;

	public Email() {
		this.to = new ArrayListxStringx();
		this.cc = new ArrayListxStringx();
	}

	public Email(String from, String toList, String subject, String message) {
		this();
		this.from = from;
		this.subject = subject;
		this.message = message;
		this.to.addAll(Arrays.asList(splitByComma(toList)));
	}

	public Email(String from, String toList, String ccList, String subject, String message) {
		this();
		this.from = from;
		this.subject = subject;
		this.message = message;
		this.to.addAll(Arrays.asList(splitByComma(toList)));
		this.cc.addAll(Arrays.asList(splitByComma(ccList)));
	}


        //getters and setters not mentioned for brevity

	private String[] splitByComma(String toMultiple) {
		String[] toSplit = toMultiple.split(",");
		return toSplit;
	}

	public String getToAsList() {
		return AppUtil.concatenate(this.to, ",");
	}
}
You can see that we have added some convenience constructors. After this, we will define a template class which will help us to load the required HTML or text template and prepare the message body out of it. This class will also provide dynamic variable replacement in the message body.
public class EmailTemplate {

	private String templateId;

	private String template;

	private MapxString, Stringx replacementParams;

	public EmailTemplate(String templateId) {
		this.templateId = templateId;
		try {
			this.template = loadTemplate(templateId);
		} catch (Exception e) {
			this.template = Constants.BLANK;
		}
	}

	private String loadTemplate(String templateId) throws Exception {
		ClassLoader classLoader = getClass().getClassLoader();
		File file = new File(classLoader.getResource("email-templates/" + templateId).getFile());
		String content = Constants.BLANK;
		try {
			content = new String(Files.readAllBytes(file.toPath()));
		} catch (IOException e) {
			throw new Exception("Could not read template with ID = " + templateId);
		}
		return content;
	}

	public String getTemplate(MapxString, Stringx replacements) {
		String cTemplate = this.getTemplate();

		if (!AppUtil.isObjectEmpty(cTemplate)) {
			for (Map.EntryxString, Stringx entry : replacements.entrySet()) {
				cTemplate = cTemplate.replace("{{" + entry.getKey() + "}}", entry.getValue());
			}
		}

		return cTemplate;
	}
        //getters and setters
}
You can see that the class accepts and template ID which it tries to load from /resources/email-templates folder. Here is the project structure.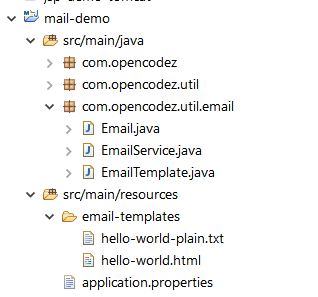
Also, you can see the utility method which gives us the message body after replacing each variable form template that is wrapped in {{var_name}} with the appropriate value from the Map you have passed to it.
Now letxs check the SMTP configuration part. As we are using Spring Boot, we donxt have to do anything except specifying the correct server details in application properties and use the JavaMailSender in your application. We have below details in our file
spring.mail.host=localhost
spring.mail.port=25
spring.mail.protocol=smtp
spring.mail.defaultEncoding=UTF-8
If you are wondering how SMTP is working on the localhost then its magic of FakeSMTP. It provides a simple runnable jar that works as our local SMPT server and we can test mails from our dev system. Once you download and run the jar on your machine it will look like this.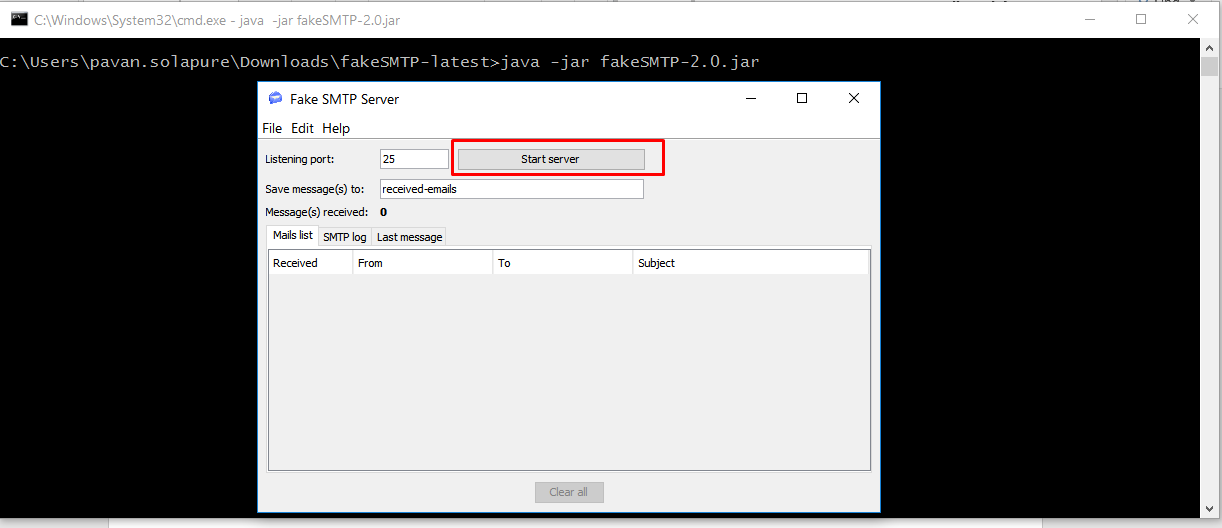
Here is our Email Service which provides utility methods to send HTML or PLAIN TEXT mails.
@Component
public class EmailService {

	@Autowired
	private JavaMailSender mailSender;

	private static final ApplicationLogger logger = ApplicationLogger.getInstance();

	public void send(Email eParams) {
		if (eParams.isHtml()) {
			try {
				sendHtmlMail(eParams);
			} catch (MessagingException e) {
				logger.error("Could not send email to : {} Error = {}", eParams.getToAsList(), e.getMessage());
			}
		} else {
			sendPlainTextMail(eParams);
		}
	}

	private void sendHtmlMail(Email eParams) throws MessagingException {
		boolean isHtml = true;
		MimeMessage message = mailSender.createMimeMessage();
		MimeMessageHelper helper = new MimeMessageHelper(message);
		helper.setTo(eParams.getTo().toArray(new String[eParams.getTo().size()]));
		helper.setReplyTo(eParams.getFrom());
		helper.setFrom(eParams.getFrom());
		helper.setSubject(eParams.getSubject());
		helper.setText(eParams.getMessage(), isHtml);
		if (eParams.getCc().size() x 0) {
			helper.setCc(eParams.getCc().toArray(new String[eParams.getCc().size()]));
		}
		mailSender.send(message);
	}

	private void sendPlainTextMail(Email eParams) {
		SimpleMailMessage mailMessage = new SimpleMailMessage();
		eParams.getTo().toArray(new String[eParams.getTo().size()]);
		mailMessage.setTo(eParams.getTo().toArray(new String[eParams.getTo().size()]));
		mailMessage.setReplyTo(eParams.getFrom());
		mailMessage.setFrom(eParams.getFrom());
		mailMessage.setSubject(eParams.getSubject());
		mailMessage.setText(eParams.getMessage());
		if (eParams.getCc().size() x 0) {
			mailMessage.setCc(eParams.getCc().toArray(new String[eParams.getCc().size()]));
		}
		mailSender.send(mailMessage);
	}
}
Below is the code to send mail using our template system.
@Autowired
EmailService emailService;
String from = "pavan@localhost";
String to = "solapure@localhost";
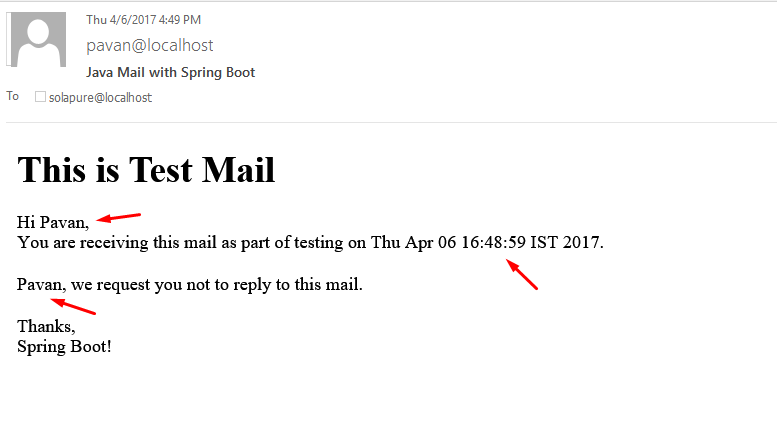
String subject = "Java Mail with Spring Boot";
EmailTemplate template = new EmailTemplate("hello-world.html");
MapxString, Stringx replacements = new HashMapxString, Stringx();
replacements.put("user", "Pavan");
replacements.put("today", String.valueOf(new Date()));
String message = template.getTemplate(replacements);
Email email = new Email(from, to, subject, message);
email.setHtml(true);
emailService.send(email);
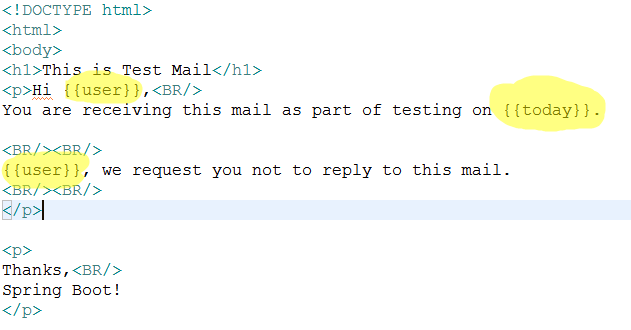
and here is our template, you can see how we have used the replacement variables and replaced them dynamically while sending mail. Plain text templates will be similarly prepared and processed.
Once you run the application you will see an email entry immediately in your FakeSMTP server as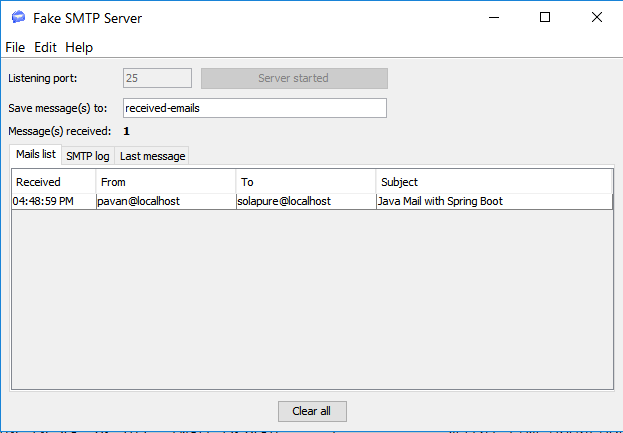
You can double click the mail and see how it looks. Check below Tadaaa!!!!! Itxs your HTML mail
Isnxt it easy? Go ahead and download the code from our Github and use it.
Please get back to me if you see any issue in the code or need the help of some sort.